Homework Tasks
Here you will find a list of homework tasks that you must complete weekly. This is Advanced level study therefore if you are ill or absent from any lessons it is your responsibility to catch up with the work. This website has been designed to ensure every student can access all lesson plans, homeworks, info from anywhere around the world as long as you have web access! Remember we are here to guide you, if you have a genuine reason for not attending a studio session or homework please find a member of the Art team and we will help you plan your time at home and utilise private study sessions in order to gain your full potential!
Week One
You will need to get yourself ready for the course this week! You will need a camera ( preferably a DSLR camera) It doesn't have to be brand new. Try checking out websites like preloved for a bargain! You will also need the following kit:-
1: Spiral Hardback A3 journal - Staples do a great range but it MUST be sprial bound in order to hold all your photographs and notes.
2: Ring binder for all your lecture notes
3: Camera with a memory card ( pref DSLR)
If your feeling dedicated to the profession then you could invest in a tripod ( these can be anything from £10 upward) again look around for a bargain online. A telephoto lens would also help you!
TASK TWO
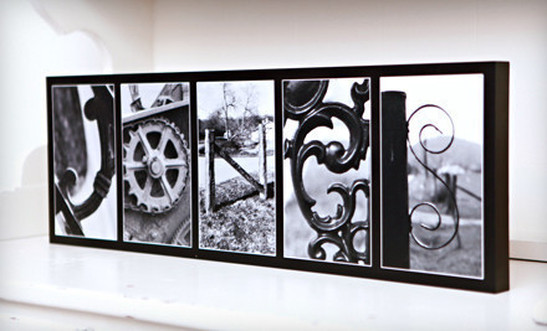
Print out and mount your 'natural framing' labels. Remember these should spell put your full name! Laminate and stick on the front of your journal!
1: Spiral Hardback A3 journal - Staples do a great range but it MUST be sprial bound in order to hold all your photographs and notes.
2: Ring binder for all your lecture notes
3: Camera with a memory card ( pref DSLR)
If your feeling dedicated to the profession then you could invest in a tripod ( these can be anything from £10 upward) again look around for a bargain online. A telephoto lens would also help you!
TASK TWO
Print out and mount your 'natural framing' labels. Remember these should spell put your full name! Laminate and stick on the front of your journal!
Task two
download the link below and complete by Wednesday the 26th of Sept
| homework_task_2.docx |
Task three
1: In your personal project folder you have to write out the introduction to your topic. If you are stuck or need your work checking you must come to EF12 by Friday. It should be well presented with inspirational images and an in depth description of your topic. What are you studying? Why? What will you look into? Who is working in a similar field and why are you inspired by them? Make your page visually appealing.
2: On the second page in your personal project folder you must write out/ print out your critical study. This should have images and is based on your current blog entries. YOU MUST HAVE THIS CHECKED BY A TEACHER FIRST.
BELOW IS AN EXAMPLE FROM ANOTHER SCHOOL. PRESENTATION IS KEY.
Open publication - Free publishing
Task Four ( two parts)
Light Drawing
You will need to go out and take your own light drawing images. You will need an led light or a flash light. Either go outside at night ( in pitch dark) or a darkened room. Now you need to set your camera ...below are different settings
for different cameras:-
POINT & SHOOT
CAMERAS
First, see if there is a manual mode on your camera. Mine has a dial where green is Auto, then it says P, Tv, Av, M, C. It’s the M for manual on mine. If there is no "M", consult the camera handbook. Once on, look for the exposure settings it should say 15” and F8.0. The first number is the length of the exposure or shutter speed, (good chances you have a 30 seconds limit, I have a 15 seconds limit). The second number is the F Stop, the amount of light let into the camera during specified time.
My camera’s F Stop goes from f/2.8 (the widest opening letting in the most light) to f/8.0 (f/8.0 is very common for point and shoots). On mine I have to hit a different button to change the cursor from the time to the f stop and
back, you may have to do this too. Also make sure to turn the flash off. Look for the symbol where it has a lighting in a Ghostbusters sign. Shooting with the point and shoot camera is easy after that. Once you have it dark, and the camera set on a tripod or rock nearby, set the timer on the camera to 5 seconds - This will reduce and camera shakes from pressing the shutter release and will allow you some time to move into location.
You also need to
control the amount of light that goes from your light source to the sensor. If you are using a bright light source, you may need to stop down the aperture. You can do some trial and error on this, but you need to start somewhere, so
let's wing it at f2.8 at 10”.
DSLR CAMERAS
If you are using an SLR camera such as a Canon Dl Rebel or Nikon D40 you can take more elaborate long
exposure photographs. The reason for this is that SLRs usually support exposures longer than 1 second. However there is an extra accessory you need to get - a cable release which allows you to keep the shutter open as long as
needed. They cost between 20-30 pounds, but it is worth it after you get all excited about light painting which you will. Set your camera to Bulb for the exposure time setting. If you were going up on the dial such as 10 sec, 15 sec,
30 sec, the next would be Bulb. You can hold the button down if you don't have a cable release but you must be careful not to shake the camera on the tripod.
Take The Photograph
Once you press the shutter release, you have about five seconds to go to the other side of the camera and do you thing. Once you are facing the camera and the photo is "exposing" you can move your lights around to make different “brushstrokes” in the photo. You can spin lights, loop, move, twirl, throw, bounce, and much more to get different effects.
IF YOU ARE STUCK LOOK UP YOUR CAMERA SETTINGS ON GOOGLE. YOU WILL FIND LOTS OF INSPIRATION AND INFORMATION.
PART TWO
Go to the portfolio requirements tab and click on technical folder. You need to read each task and complete the write up and critical studys. Start with depth of field and end with light drawing. Please hand in next week for marks.
Task Five ( Oct 10th)
Take 30 photographs that link with your topic and bring to class on a USB stick. Upload the best images to your blog before next wednesday. Think about the composition of your image, lighting etc and does it link with the artists you have already studied?
Update your blogs with the composite images you took last week with an explanation. Also write this up in your technical folder.
Print out your experiments from todays lesson and mount with explanations into your blog.
Complete the targets in your personal folder.
Update your blogs with the composite images you took last week with an explanation. Also write this up in your technical folder.
Print out your experiments from todays lesson and mount with explanations into your blog.
Complete the targets in your personal folder.
TASK 6: BLOG WORK
All hard copies have now been submitted for final AP1 marks. This week is about getting your blogs upto date as some of them are looking a little bit sparse!
You need to have 3 critical studies online by Wed morning. These need to be written using the NEW photography critical study sheet. A link can be found on the blog page if you scroll down. Do not copy and paste info as you will not get any marks! Explain why the image inspires you? what technical aspects of photography has the photographer used?
Then after each criitical study you must upload your own images influenced by the photographer WITH analysis explaining the success criteria. You must also upload youtr pjhotoshop techniques to the technical page and the blog page. Make sure you have a series of your own high quality photographs on the blog as this is a photography course and some of you only have 1-2 pictures based on your project!
TASK 7: INDIVIDUAL TARGETS
Over the half term you need to complete all your personal tagets in your main study book. You should also make at least 3 posts to your blog showing research and development.
Extension: Some of you may wish to start filming a moving image piece to support your project. This can be edited on imovie in class.
Extension: Some of you may wish to start filming a moving image piece to support your project. This can be edited on imovie in class.
TASK 8: Individual Targets(Wed 7th)
You all have a new set of targets to complete this week. Make sure they are completed by Wed the 14th of November. Remember the targets set in class are a guide. If you decide to develop your project and set yourself extra targets please do. This will make the difference between the higher marks and average grades! Remember your blogs also need updating. For students up to date with their technical folder ( see the technical folder tab) you can set aside this book until December. November must be a development of your individual projects.
Personal Project deadline ( entire book complete ) DEC 12th. Therefore, you must stay on top of your weekly targets!
Personal Project deadline ( entire book complete ) DEC 12th. Therefore, you must stay on top of your weekly targets!