Technical Folder
Alongside your personal project you will need to complete a technical folder. This needs to be A3 in size and document all the technical aspects of using a camera and how to compose an image. You will document your knowledge, images and analyse other photographers who do this. You must include all your images, even the ones that don't quite make the grade. When you do this you can analyse your work explaining how you can and will improve on the next shot. REMEMBER YOUR PHOTOGRAPHS NEED TO BE CREATIVE AND INTERESTING TO GAIN AN A-C, WITH INDEPTH ANALYSIS. ALWAYS PRINT OUT A CONTACT SHEET OF IMAGES FOR EACH TECHNIQUE, PRINT BEST 2 TO ANALYSE AND FINAL A4 GLOSS IMAGE.
Here you will find a breakdown of each page:-
1) ISO/APERTURE
write about what ISO and Aperture is and how this can effect your images.Use diagrams from internet to illustrate.
2) DEPTH OF FIELD
Over a double page you need to write up what depth of field means with a title. This needs to be 1/2 a page long. Then you need to print out your depth of field photographs and annotate them . Use the clip below to help you explain your image. Your work needs to be mounted neatly and think about the presentation. You must have one image where the foreground is in focus and the background blurred. The second image should have the background in focus and the foreground blurred.
3) CRITICAL STUDY DEPTH OF FIELD
Find a photographer who uses depth of field in their work. On the opposite page write a critical study on the image. Use the youtube clip above to help you explain what it is the photographer has done and why. This needs to be about an A4 page long and include an A5 image of the artists work. Annotate and draw on the image explaining the main focus and depth of field.
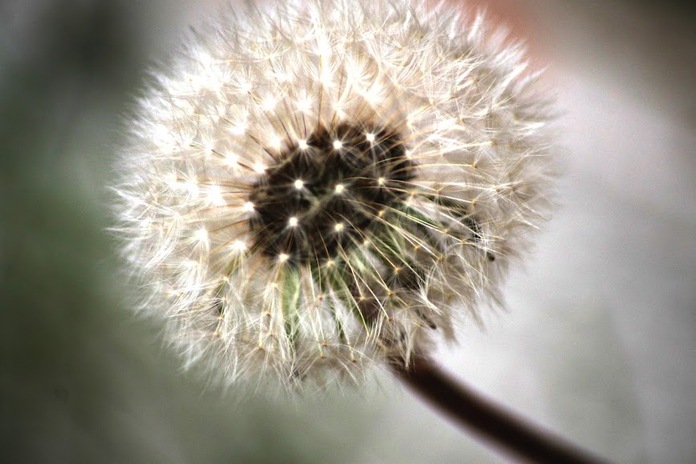
4) MACRO PHOTOGRAPHY
Explain what macro photography is ( in your own words) and the settings needed on your camera. Again this must be 1/2 a page. Underneath print out two of your best macro photographs and annotate explaining the image. Is it effective? why? is it all in focus? could some areas be clearer? what can you do to improve the image, make it more interesting?
Find a photographer who uses depth of field in their work. On the opposite page write a critical study on the image. Use the youtube clip above to help you explain what it is the photographer has done and why. This needs to be about an A4 page long and include an A5 image of the artists work. Annotate and draw on the image explaining the main focus and depth of field.
4) MACRO PHOTOGRAPHY
Explain what macro photography is ( in your own words) and the settings needed on your camera. Again this must be 1/2 a page. Underneath print out two of your best macro photographs and annotate explaining the image. Is it effective? why? is it all in focus? could some areas be clearer? what can you do to improve the image, make it more interesting?
3) CRITICAL STUDY: MACRO
Find a photographer who uses depth of field in their work. On the opposite page write a critical study on the image. Use the critical study sheet to help, DO NOT COPY AND PASTE INFO ON THE PHOTOGRAPHER. This needs to be about an A4 page long and include an A5 image of the artists work. Annotate and draw on the image
explaining the main focus and depth of field.
4) LIGHT DRAWING
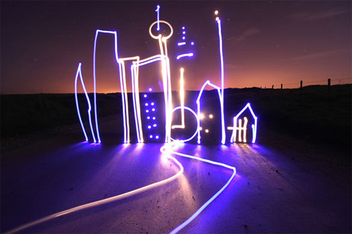
The images you took for homework need to be mounted in your journal. Start with the header 'Light Drawing' and write up what this means and how you took your images. Underneath you must print and mount your images.
On the opposite page you need to find examples of photographers light paintings and write up an analysis/critical study on the artists /photographers work.
On the opposite page you need to find examples of photographers light paintings and write up an analysis/critical study on the artists /photographers work.
6) Cyanotypes
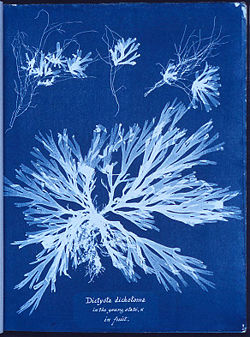
This week you have produced your own cyanotype (blueprint). Using the handout sheet you need to explain what a cyanotype is and how they are produced. You must then mount up your own cyanotype with an explanation. On the opposite page you need to write about the first female photographer Anna Atkins and her use of cyanotypes in the first photography book on Algae.
5) composite images
Produce a write up on your classwork. Print out your print screens and explain the mask layers tool. How did you create the image? photoshoot? what would you do again to improve your image? What went well? The more you use technical terms the higher your grade will be!
7)Lighting
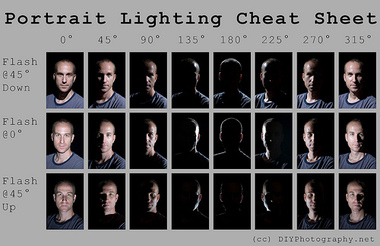
Using a light/torch or flash write about the different effects lighting can achieve ( side A4). Then take a series of photos like the one on your left illustrating the effects of different light.
8)High Speed Flash
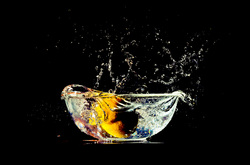
Write up information about high speed flash and how this is used in photography ( A4 minimum). What is it? When do you use it? What effects can it create? Analyse a photographers work.
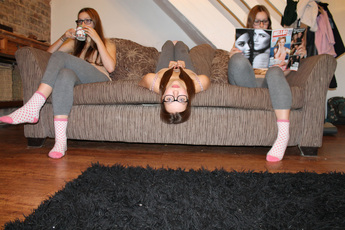
7) Photoshop experiments
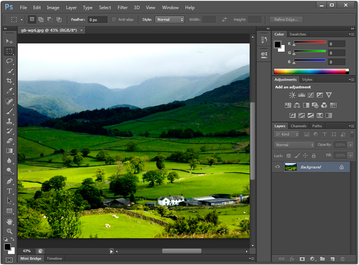
Mount up 5 photoshop experiments in your technical folder. These should include an explanation of your work and the tools you have used. Make sure you include screenshots and a final shot. Make sure your experiments link with your chosen question where possible.
This needs to be a step by step guide like the ones in the magazines. If you are tsuck for ideas/techniques purchase a specialist magazine from the supermarket for inspiration.
This needs to be a step by step guide like the ones in the magazines. If you are tsuck for ideas/techniques purchase a specialist magazine from the supermarket for inspiration.
8) Arrange work experience with a photographer or visit a photographer.

Arrange to visit a photographer and write a series of questions you would like to ask them about their work. Interview the photographer about the technical aspect of their work. Subject matter? kit? Lighting? Post production? If you are lucky you may get the opportunity to work alongside the photographer as an assistant for the day.
Photograph your visit to show evidence. Analyse a piece of your chosen photographers work and take your own photographs in their style to show understanding.
If you cannot arrange a visit you must contact them via email or telephone to ask them questions about their work.
Photograph your visit to show evidence. Analyse a piece of your chosen photographers work and take your own photographs in their style to show understanding.
If you cannot arrange a visit you must contact them via email or telephone to ask them questions about their work.